Community Project
|
|
Sherwood Forest Community Project |
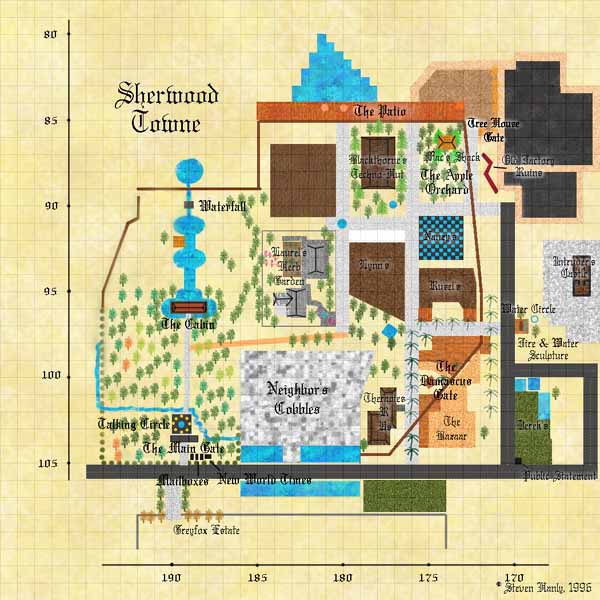
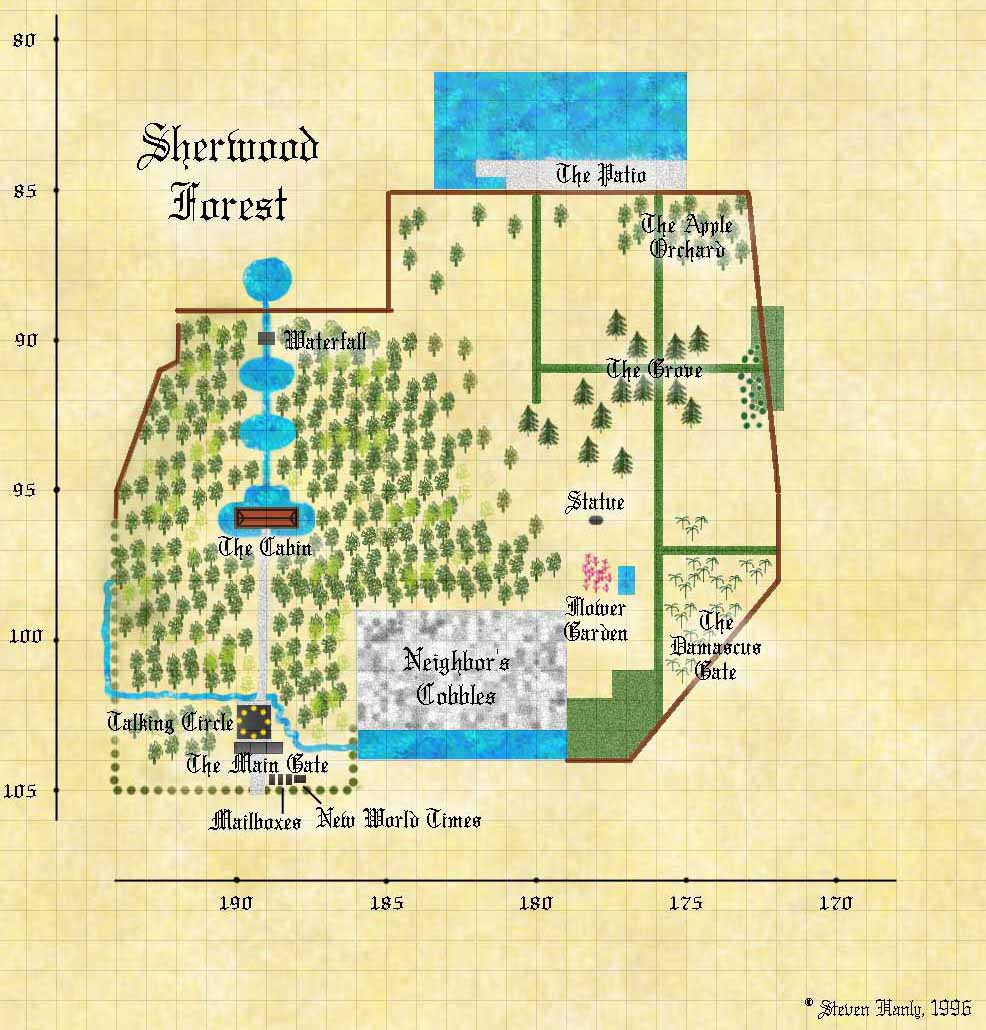
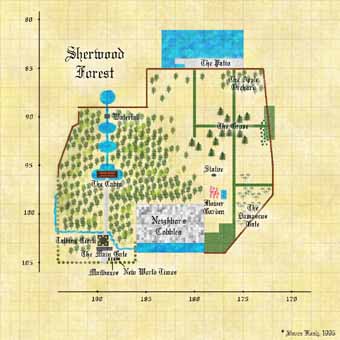
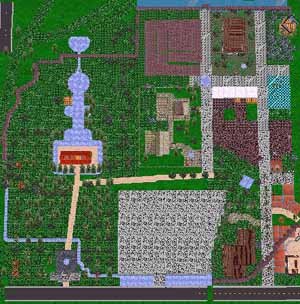
 Hand Drawn Map
|
Ariel Views
|
Land Registry
|
Cartographer's Ramblins
|
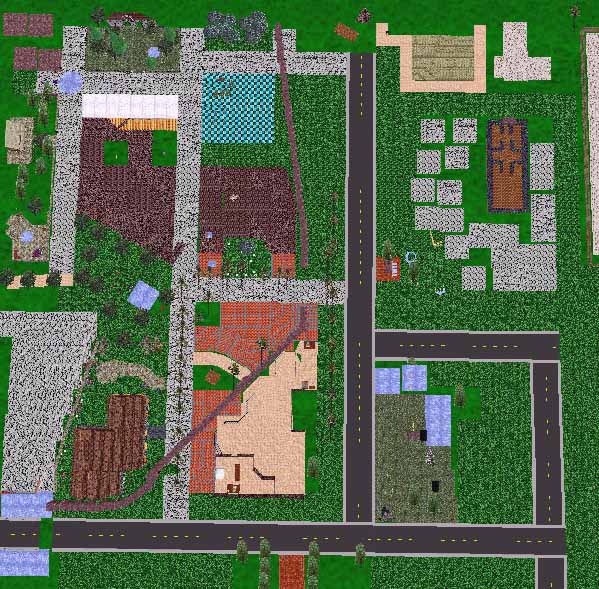
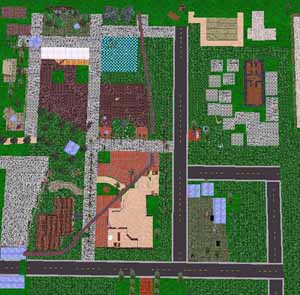
New Map of Sherwood Forest Towne!

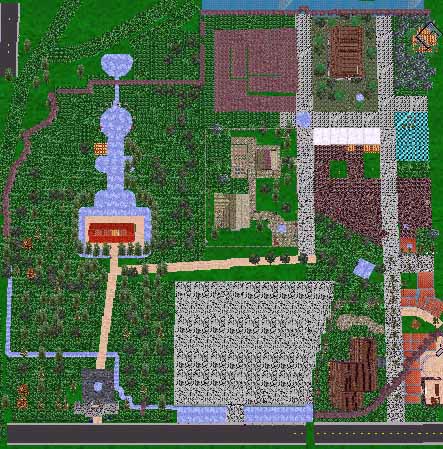
Olde Map of Sherwood Forest Towne
Click on Maps to see them!Oh how our towne hath grown from the time of April's fools to June's full flower!
To homestead in Sherwood Towne, contact our, Land Manager. There are still lots left, but lots have been taken. See the roster of lands. Land Registry
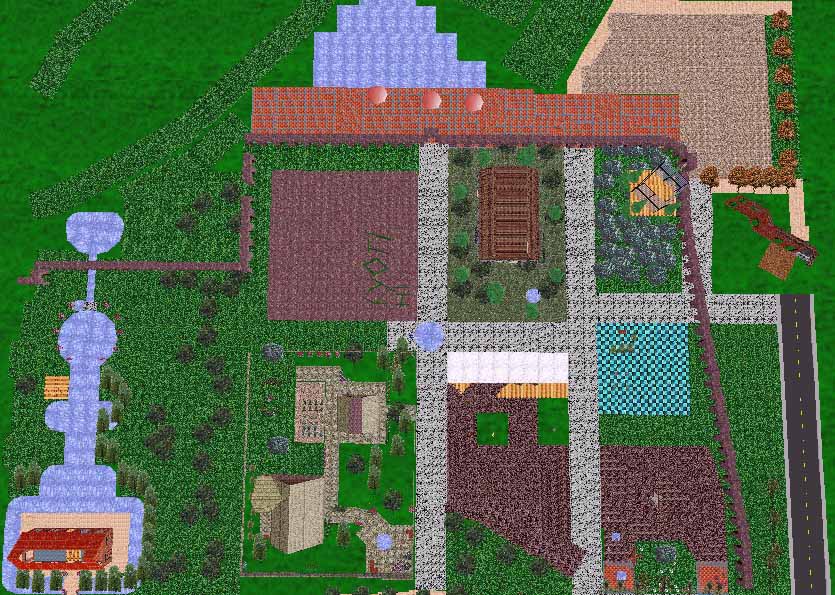
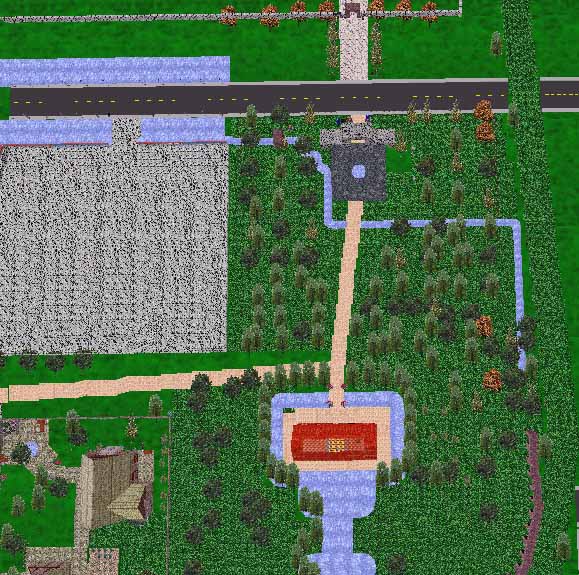
Ariel Views from Our Baloon
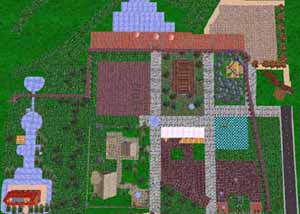
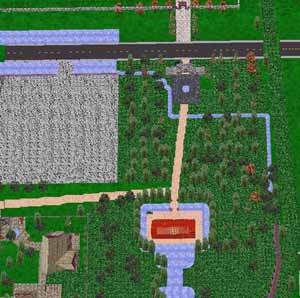
Ariel View of Towne Center View of Sherwood Forrest
Damascas Gate to the Ruins Very High Altitude View
Cartographer's Ramblins
When I first started to think about the Map of Sherwood, I thought that it was a good idea. After all, when one builds a neighborhood, it is wise to start with a layout in order to plan any future buildings. This enables you to get a feel for the place, and allows you to visualize what the final product will be.When I first started working on it, it struck me that I was creating a document that was designed to "self-destruct", as it were, once the construction began. I wasn't creating an image of What Was To Be, but What Had Gone Before. Once I was done with the map, it was to be torn apart. So it wasn't a blueprint. It was a historical document that would chronicle the development of one of the first true digital communities. This assumes that future maps would be made, of course, at regular intervals, showing the changes wrought by the hands of, well, avatars. World building by the aspects of gods.
I started the process by having Roger and Nancy fly around at the Sherwood site in AlphaWorld. They would call out coordinates while I hurredly sketched a map, placing all of the interesting bits of the area. I did not map out every tree, since I'm not an idiot, and it wasn't necessary anyway. Besides, old maps were hardly that accurate anyway! Alright, now that we had a sketch, it was time to start the hard work. Make it pretty, readable, effective, and appropriate to the "feel" of the site. So, first off, I had to use parchment. No problem, since I have Photoshop filters that made this child's play (okay, it took a bit of work...:-) Then I laid out the aqueduct, the cabin, the water, and the main forested areas. Then I went in and filled in the small details.
At this point, I had all of the stuff laid out. But it didn't look right. So I gave it a more "hand drawn" look, by using some more Photoshop filters. This varied the textures a bit, so the water wasn't a single color, nor was the forest. The water turned out well. The forest was lacking something, though. It was, currently, a large mass of variegated greens. So I erased it, replacing it with a more iconic approach that not only looked a lot better, but fit the style I was looking for as well.
Once the map looked more or less like I wanted it, it was time to put in the words. Of course, being a somewhat "medieval" site, I used some Olde English style lettering. I have five or six fonts of this style, and I chose the least "decorated" one, since readability was necessary.
That was it. The map was done. All that remained was show it off and upload it to the website. I made two versions for that, by the way. A smallish picture without words, and a full size picture with them. That way, web surfers wouldn't have to wait to download a huge graphic file.

|
Back to Consortium Home Page |
© 1996 Contact Consortium, All Rights Reserved.